文章目录[隐藏]
YOLOv3实现鱼类目标检测
我将以一个项目实例,记录如何用YOLOv3训练自己的数据集。
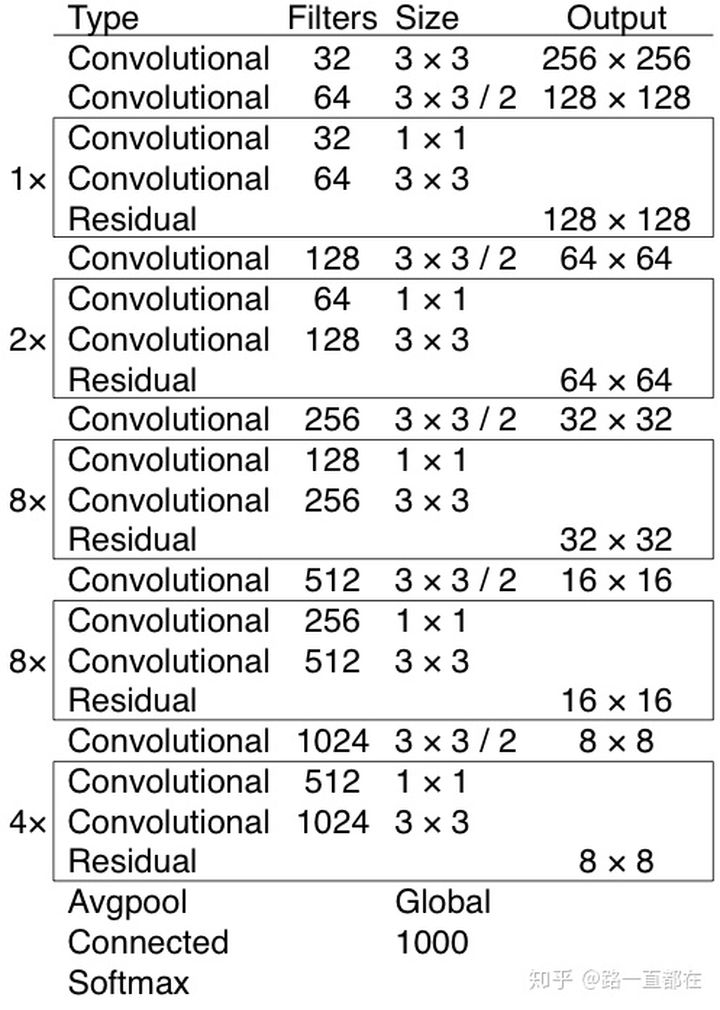
在开始之前,首先了解一下YOLO系列代表性的DarkNet网络。
如下图所示,是YOLOv3中使用的DarkNet-53的结构,几种核心结构是:
DBL: 是yolo_v3的基本组件。就是卷积+BN+Leaky relu。对于v3来说,BN和leaky relu已经是和卷积层不可分离的部分了(最后一层卷积除外),共同构成了最小组件。
resn:n代表数字,有res1,res2, … ,res8等等,表示这个res_block里含有多少个res_unit。这是yolo_v3的大组件,yolo_v3开始借鉴了ResNet的残差结构,使用这种结构可以让网络结构更深(从v2的darknet-19上升到v3的darknet-53,前者没有残差结构)。
concat:张量拼接。将darknet中间层和后面的某一层的上采样进行拼接。拼接的操作和残差层add的操作是不一样的,拼接会扩充张量的维度,而add只是直接相加不会导致张量维度的改变。
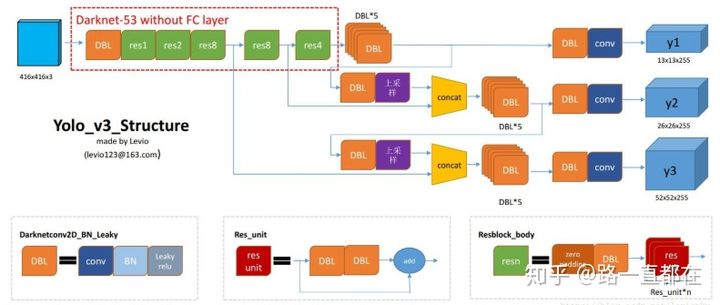
下图是v3著名的Darknet53网络图,它融合了YOLOv2, Darknet19,以及其他新型的残差网络,由连续的3x3和1x1卷积层组合而成,一共有53个卷积层。
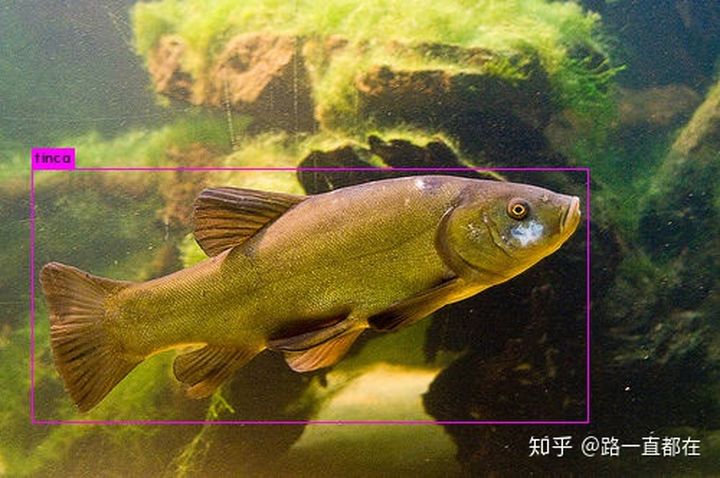
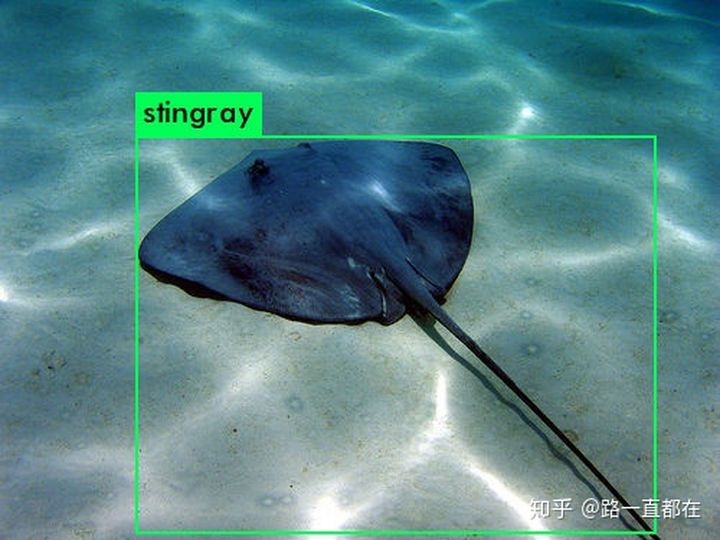
任务:鱼类目标检测
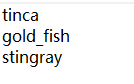
数据集描述:3类(tinca,gold_fish,stingray),900张图片
数据集格式:VOC
- 准备工作:
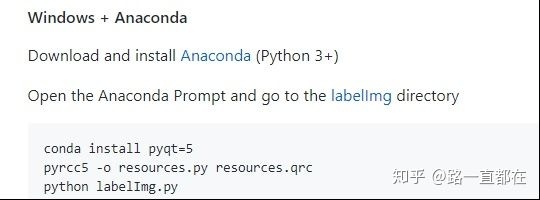
- 进入YOLO官网,跑通Demo
YOLO: Real-Time Object Detectionpjreddie.com
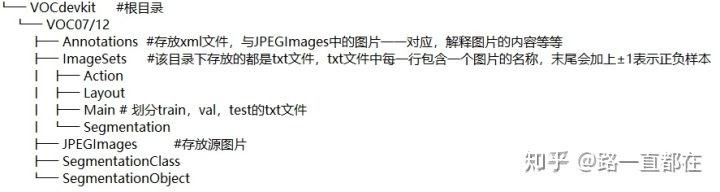
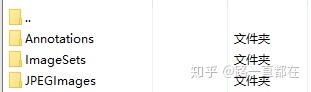
- 准备自己的数据集 ,以VOC为例,如果只进行目标检测,下列几个文件夹要准备好,将图片保存在VOC的JPEGImages目录下
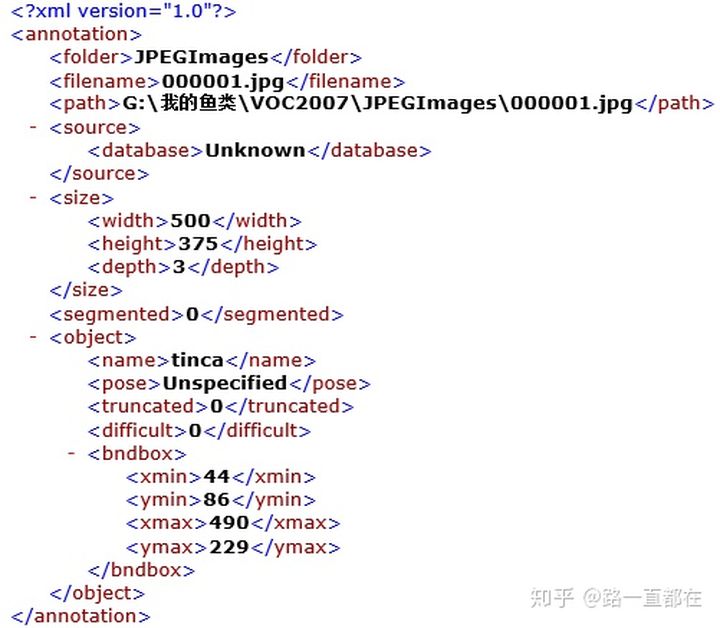
- 利用工具进行图片标注并生成XML文件,将用LabelImg标注好得到的XML文件放到Annotations文件夹下。注意,需要和图片名相同,标注图片类别时要统一用小写字母,否则会出错
这样,VOC格式的数据集制作基本完成。
2. 开始调试模型
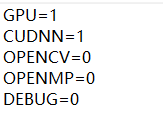
- 修改Makefile
*建议GPU和CUDNN都改为1,会极大地加快训练速度,OPENCV可以有选择的开
*修改完成后记得要重新make才能生效
- 修改voc_label.py
import xml.etree.ElementTree as ET
import pickle
import os
from os import listdir, getcwd
from os.path import join
sets=[('2007', 'train'), ('2007', 'val'), ('2007', 'test')]  #替换为自己的数据集
classes = ["tinca", "gold_fish", "stingray"]     #修改为自己的类别

def convert(size, box):
    dw = 1./(size[0])
    dh = 1./(size[1])
    x = (box[0] + box[1])/2.0 - 1
    y = (box[2] + box[3])/2.0 - 1
    w = box[1] - box[0]
    h = box[3] - box[2]
    x = x*dw
    w = w*dw
    y = y*dh
    h = h*dh
    return (x,y,w,h)
def convert_annotation(year, image_id):
    in_file = open('VOCdevkit/VOC%s/Annotations/%s.xml'%(year, image_id))  #将数据集放于当前目录下
    out_file = open('VOCdevkit/VOC%s/labels/%s.txt'%(year, image_id), 'w')
    tree=ET.parse(in_file)
    root = tree.getroot()
    size = root.find('size')
    w = int(size.find('width').text)
    h = int(size.find('height').text)
    for obj in root.iter('object'):
        difficult = obj.find('difficult').text
        cls = obj.find('name').text
        if cls not in classes or int(difficult)==1:
            continue
        cls_id = classes.index(cls)
        xmlbox = obj.find('bndbox')
        b = (float(xmlbox.find('xmin').text), float(xmlbox.find('xmax').text), float(xmlbox.find('ymin').text), float(xmlbox.find('ymax').text))
        bb = convert((w,h), b)
        out_file.write(str(cls_id) + " " + " ".join([str(a) for a in bb]) + '\n')
wd = getcwd()
for year, image_set in sets:
    if not os.path.exists('VOCdevkit/VOC%s/labels/'%(year)):
        os.makedirs('VOCdevkit/VOC%s/labels/'%(year))
    image_ids = open('VOCdevkit/VOC%s/ImageSets/Main/%s.txt'%(year, image_set)).read().strip().split()
    list_file = open('%s_%s.txt'%(year, image_set), 'w')
    for image_id in image_ids:
        list_file.write('%s/VOCdevkit/VOC%s/JPEGImages/%s.jpg\n'%(wd, year, image_id))
        convert_annotation(year, image_id)
    list_file.close()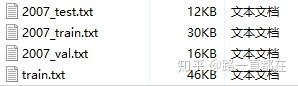
os.system("cat 2007_train.txt 2007_val.txt > train.txt") #修改为自己的数据集用作训练- python voc_label.py
- 修改cfg文件中的voc.data
classes= 3    #修改为自己的类别数
train  = /darknet/data/voc/train.txt   #修改为自己的路径
valid  = /darknet/data/voc/2007_test.txt   #修改为自己的路径
names =/data/voc.names
backup = /home/learner/darknet/backup #修改为自己的路径,输出的权重信息将存储其内- 修改data/voc.names
*修改为自己数据集的类别名称
- 下载预训练卷积层权重,放在项目根目录即可
wget https://pjreddie.com/media/files/darknet53.conv.74*我也把权重文件上传到了网盘,多一种下载选择
链接: https://pan.baidu.com/s/1ZBICNgOQa4DKSKUnA09jVA 提取码: bymq
- 修改cfg/yolov3-voc.cfg
*一定看清楚修改的网络层数和数值计算方法,而且,训练过程中,要把testing相关注释掉
# Training
 batch=64
 subdivisions=32   #每批训练的个数=batch/subvisions,根据自己GPU显存进行修改,显存不够改大一些
# Testing
# batch=1
# subdivisions=1
width=416
height=416
channels=3
momentum=0.9
decay=0.0005
angle=0
saturation = 1.5
exposure = 1.5
hue=.1

learning_rate=0.001
burn_in=1000
max_batches = 50200  #训练步数
policy=steps
steps=40000,45000  #开始衰减的步数
scales=.1,.1


[convolutional]
batch_normalize=1
filters=32
size=3
stride=1
pad=1
activation=leaky

.....

[convolutional]
size=1
stride=1
pad=1
filters=24   #filters = 3 * ( classes + 5 )   here,filters=3*(3+5)
activation=linear

[yolo]
mask = 6,7,8
anchors = 10,13,  16,30,  33,23,  30,61,  62,45,  59,119,  116,90,  156,198,  373,326
classes=3    #修改为自己的类别数
num=9
jitter=.3
ignore_thresh = .5
truth_thresh = 1
random=1

[route]
layers = -4

[convolutional]
batch_normalize=1
filters=256
size=1
stride=1
pad=1
activation=leaky

[upsample]
stride=2

[route]
layers = -1, 61


[convolutional]
batch_normalize=1
filters=256
size=1
stride=1
pad=1
activation=leaky

[convolutional]
batch_normalize=1
size=3
stride=1
pad=1
filters=512
activation=leaky

[convolutional]
batch_normalize=1
filters=256
size=1
stride=1
pad=1
activation=leaky

[convolutional]
batch_normalize=1
size=3
stride=1
pad=1
filters=512
activation=leaky

[convolutional]
batch_normalize=1
filters=256
size=1
stride=1
pad=1
activation=leaky

[convolutional]
batch_normalize=1
size=3
stride=1
pad=1
filters=512
activation=leaky

[convolutional]
size=1
stride=1
pad=1
filters=24    #filters = 3 * ( classes + 5 )   here,filters=3*(3+5)
activation=linear

[yolo]
mask = 3,4,5
anchors = 10,13,  16,30,  33,23,  30,61,  62,45,  59,119,  116,90,  156,198,  373,326
classes=3  #修改为自己的类别数
num=9
jitter=.3
ignore_thresh = .5
truth_thresh = 1
random=1

[route]
layers = -4

[convolutional]
batch_normalize=1
filters=128
size=1
stride=1
pad=1
activation=leaky

[upsample]
stride=2

[route]
layers = -1, 36


[convolutional]
batch_normalize=1
filters=128
size=1
stride=1
pad=1
activation=leaky

[convolutional]
batch_normalize=1
size=3
stride=1
pad=1
filters=256
activation=leaky

[convolutional]
batch_normalize=1
filters=128
size=1
stride=1
pad=1
activation=leaky

[convolutional]
batch_normalize=1
size=3
stride=1
pad=1
filters=256
activation=leaky

[convolutional]
batch_normalize=1
filters=128
size=1
stride=1
pad=1
activation=leaky

[convolutional]
batch_normalize=1
size=3
stride=1
pad=1
filters=256
activation=leaky

[convolutional]
size=1
stride=1
pad=1
filters=24    #filters = 3 * ( classes + 5 )   here,filters=3*(3+5)
activation=linear

[yolo]
mask = 0,1,2
anchors = 10,13,  16,30,  33,23,  30,61,  62,45,  59,119,  116,90,  156,198,  373,326
classes=3   #修改为自己的类别数
num=9
jitter=.3
ignore_thresh = .5
truth_thresh = 1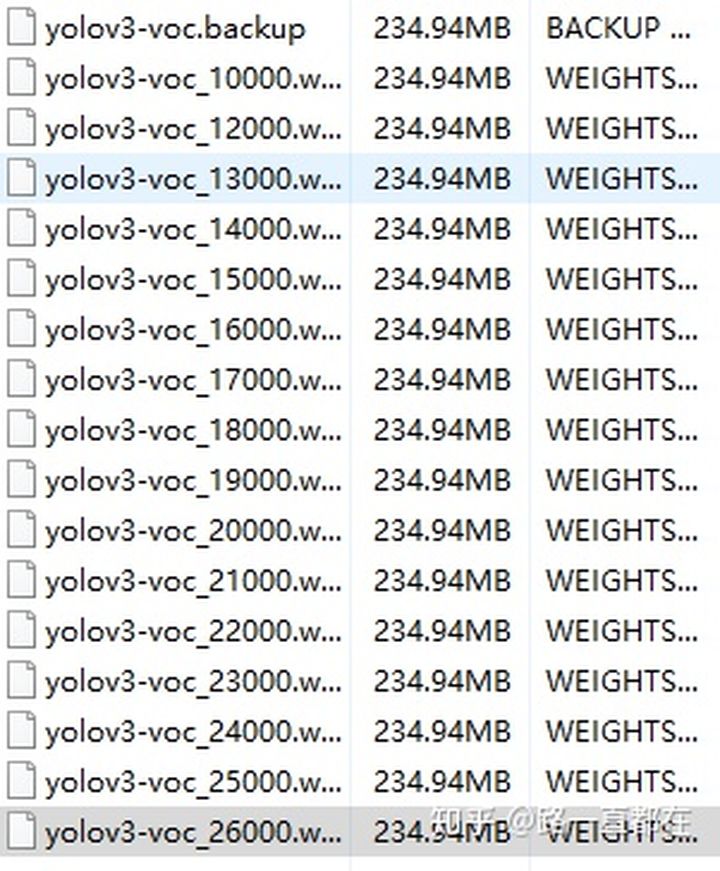
random=1- 开始训练,权重文件会保存在backup文件夹下
./darknet detector train cfg/voc.data cfg/yolov3-voc.cfg darknet53.conv.74 gpus 0,1,2 #根据自己机器的实际情况选择gpu数*利用gpu训练的速度非常快,经过20000次以上迭代后,loss差不多就降到0.1以下
- 测试
*修改cfg/yolov3-voc.cfg中,将training相关注释掉,打开testing开关
./darknet detector test cfg/voc.data cfg/yolov3-voc.cfg backup/yolov3-voc_26000.weights xxx.jpg’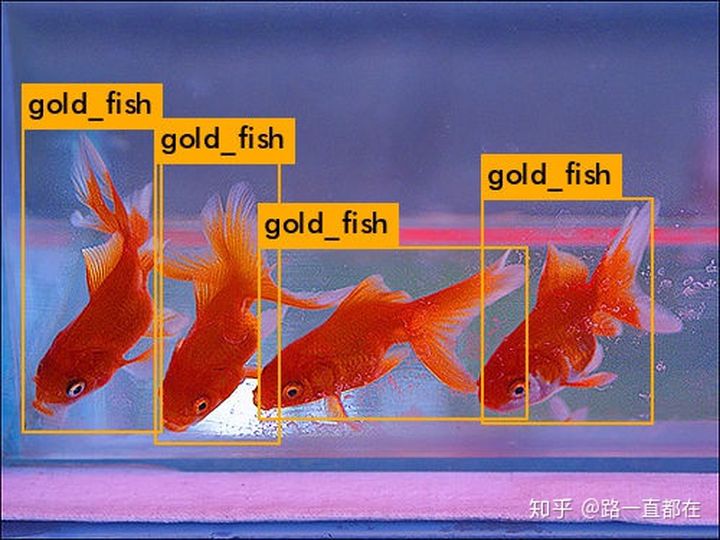
总结:
YOLO系列是目标检测领域的标志性网络,它速度快,经过几个版本的进化后,在准确率上也有了很多的提升,希望通过我的介绍,能够对YOLO的思想有所了解,也希望能给您更多的启发,有更多的想法建议,欢迎留言交流
任何程序错误,以及技术疑问或需要解答的,请扫码添加作者VX

版权声明:本文为CSDN博主「sinat_28371057」的原创文章,遵循CC 4.0 BY-SA版权协议,转载请附上原文出处链接及本声明。
原文链接:https://blog.csdn.net/sinat_28371057/article/details/114156086


