文章目录[隐藏]
本文的内容结构
本文内容分为2个部分,
第一部分介绍各个版本yolo使用的数据集的情况及3个转换代码,有经验的可以直接取用。
第二部分是详细转换教程适合没有经验的小白朋友,按照说明无脑操作就行
PS:本文中文件夹结构是一句url1中来的
url1:https://github.com/bubbliiiing/yolov4-pytorch
url2:https://blog.csdn.net/qq_45359151/article/details/107591434?utm_medium=distribute.pc_relevant.none-task-blog-baidulandingword-2&spm=1001.2101.3001.4242
在yolo各个版本中使用的略有不同
yolov4,v5可用的数据形式比较多。
YOLOV4:
例如url1中是yolov4网络,使用的是xml格式转换的(详见VOCdevkit中的voc2yolo4.py)
url1:https://github.com/bubbliiiing/yolov4-pytorch
YOLOV5:
对于yolov5要特殊说面下,支持3种数据读取方式的(应该说coco.yaml支持)

网上转换的大多是第二种,但是由于未知原因,第二种方法转换出来的数据我总是报错。所以我索性在此基础上写了个小程序,转化成第一种形式,因为V5作者用的是这种形式所以在这里称为官方形式。
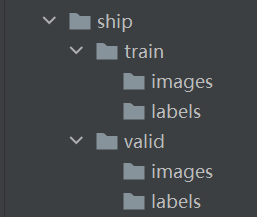
第一种形式的转换:
官方是这种文件中train与valid下images/labels拆开的形式,下图是我自己的ship是数据集,问了个大神他也推荐官方这种方式。详细转换过程看本文第二部分
第二种形式的转换:
url2中是yolov5网络,使用的是txt格式(需要两次转化),可以看到第一个make_txt.py其实就上面的voc2yolo4.py,第二个是2voc_label.py(本文中称为voc2yolo5)
PS:本文中文件夹结构是一句url1中来的
url2:https://blog.csdn.net/qq_45359151/article/details/107591434?utm_medium=distribute.pc_relevant.none-task-blog-baidulandingword-2&spm=1001.2101.3001.4242
voc2yolo4.py
# reference:https://blog.csdn.net/qq_45359151/article/details/107591434?utm_medium=distribute.pc_relevant.none-task-blog-baidulandingword-2&spm=1001.2101.3001.4242
import os
import random
#读取路径查看然后修改相对路径
wd = os.getcwd()
print(wd)
xmlfilepath='Annotations' #mark,标签读取地址
saveBasePath="ImageSets/Main/"#mark存放都着急哦

trainval_percent=0.9 #测试集比例(10%),如果有另外单独的测试集则设为1,则表示该目录下所有的数据皆为测试集
train_percent=1

temp_xml = os.listdir(xmlfilepath)
total_xml = []
for xml in temp_xml:
    if xml.endswith(".xml"):
        total_xml.append(xml)

num=len(total_xml)
list=range(num)
tv=int(num*trainval_percent)
tr=int(tv*train_percent)
trainval= random.sample(list,tv)
train=random.sample(trainval,tr)

print("train and val size",tv)
print("traub suze",tr)
ftrainval = open(os.path.join(saveBasePath,'trainval.txt'), 'w')
ftest = open(os.path.join(saveBasePath,'test.txt'), 'w')
ftrain = open(os.path.join(saveBasePath,'train.txt'), 'w')
fval = open(os.path.join(saveBasePath,'val.txt'), 'w')

for i  in list:
    name=total_xml[i][:-4]+'\n'
    if i in trainval:
        ftrainval.write(name)
        if i in train:
            ftrain.write(name)
        else:
            fval.write(name)
    else:
        ftest.write(name)

ftrainval.close()
ftrain.close()
fval.close()
ftest .close()
voc2yolo5.py(其实就是2voc_label.py)
import xml.etree.ElementTree as ET
import pickle
import os
from os import listdir, getcwd
from os.path import join
sets = ['train', 'test','val']
classes = ['ship'] #需要更改
def convert(size, box):
    dw = 1. / size[0]
    dh = 1. / size[1]
    x = (box[0] + box[1]) / 2.0
    y = (box[2] + box[3]) / 2.0
    w = box[1] - box[0]
    h = box[3] - box[2]
    x = x * dw
    w = w * dw
    y = y * dh
    h = h * dh
    return (x, y, w, h)
def convert_annotation(image_id):
    in_file = open('Annotations/%s.xml' % (image_id)) #需要更改
    out_file = open('labels/%s.txt' % (image_id), 'w') #需要更改
    tree = ET.parse(in_file)
    root = tree.getroot()
    size = root.find('size')
    w = int(size.find('width').text)
    h = int(size.find('height').text)
    for obj in root.iter('object'):
        difficult = obj.find('difficult').text
        cls = obj.find('name').text
        if cls not in classes or int(difficult) == 1:
            continue
        cls_id = classes.index(cls)
        xmlbox = obj.find('bndbox')
        b = (float(xmlbox.find('xmin').text), float(xmlbox.find('xmax').text), float(xmlbox.find('ymin').text),
             float(xmlbox.find('ymax').text))
        bb = convert((w, h), b)
        out_file.write(str(cls_id) + " " + " ".join([str(a) for a in bb]) + '\n')
wd = getcwd()
print(wd)
for image_set in sets:
    if not os.path.exists('labels/'):
        os.makedirs('labels/')
    image_ids = open('ImageSets/Main/%s.txt' % (image_set)).read().strip().split() #需要更改
    list_file = open('%s_sets_directory.txt' % (image_set), 'w')
    labels_list_file = open('%s_labels_directory.txt' % (image_set), 'w')
    for image_id in image_ids:
        list_file.write('images/%s.jpg\n' % (image_id))
        labels_list_file.write('labels/%s.txt\n' % (image_id))
        convert_annotation(image_id)
    list_file.close()
    labels_list_file.close()
03get_pic_label.py(转移图片和label)
import os
import shutil

# ------------------------------------------------------------------
# @function:将images和labels对应文件放入对应的train和valid下
# @autor:hongqing.wang
# @comment:
    #代码测试时通过的,如果出问题一般都是路径问题
# ------------------------------------------------------------------

#打印当前路径
wd = os.getcwd()
print(wd)

#取出对应文件放入对应文件
def get_picture_labels(object_directry, target_directoty):
    print('the direct is \" {} \"'.format(os.getcwd()))
    '''
    open & read content of the specific diretory
    '''
    with open(object_directry) as  f:  # mark1,根据输出的地址调节
        name_result = f.readlines()
        for i, str in enumerate(name_result):
            name_result[i] = (str.replace('\n', ''))
            # print('now  i is {},str is {}'.format(i , str)) #用于显示文件名或调试
            shutil.move(name_result[i], target_directoty)
    print((name_result))
    print('*********************************the type of name_result is {}*********************************'.format(type(name_result)))
    print('*********************************the trsnsfer is done*********************************')
    print('*********************************the trsnsfer is done*********************************')
    print('*********************************the trsnsfer is done*********************************')
    print('*********************************the trsnsfer is done*********************************')
    print('*********************************the trsnsfer is done*********************************')


def main():
    '''
    #transfer train pic
    '''
    object_directry = './train_sets_directory.txt'
    img_target_directoty = './ship/train/images'
    get_picture_labels(object_directry, img_target_directoty)
    '''
    #transfer vaild pic
    '''
    object_directry = './test_sets_directory.txt'
    img_target_directoty = './ship/valid/images'
    get_picture_labels(object_directry, img_target_directoty)
    '''
    #transfer train label
    '''
    object_directry = './train_labels_directory.txt'
    img_target_directoty = './ship/train/labels'
    get_picture_labels(object_directry, img_target_directoty)
    '''
    #transfer valid label
     '''
    object_directry = './test_labels_directory.txt'
    img_target_directoty = './ship/valid/labels'
    get_picture_labels(object_directry, img_target_directoty)


if __name__ == '__main__':
    main()
官方数据格式转换教程

step1:下载我的代码(or自己建立如上图文件结构,注意此时文件夹都是空的)
https://github.com/hellogithubsir/data_transfer.git
step2:路径中把VOC数据形式的标签放入Annotations,图片放入images中
step3:运行01,02,03后,
最后:my_datasets就是最后我们要的数据文件夹,“my_datasets”文件夹名字改成你自己要的
PS:因为懒得考虑多种意外形式,没做容错处理,但是只要按照我步骤来就没问题。如果真的出来什么问题文件结构如上图所示重来一次就不会出错,公司里也一直用的是这个程序。
下面演示流程及对应输出结果:
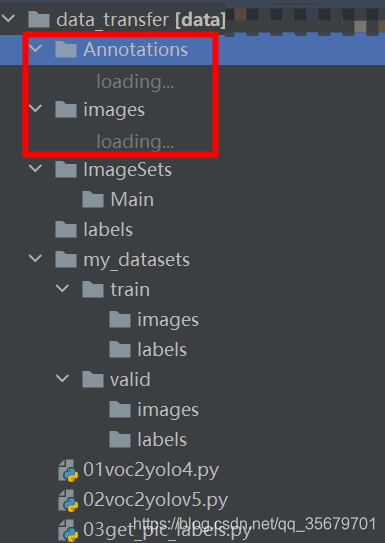
step1:下载我的代码(or自己建立如上图文件结构,注意此时文件夹都是空的)
step2:路径中把VOC数据形式的标签放入Annotations,图片放入images中,“my_datasets”文件夹名字改成你自己的
可以看到已经由空的编程可以文件展开的形式,这里图片太多所以没在载入完我就截图了
step3:
运行01,在main文件夹下出现了4个txt
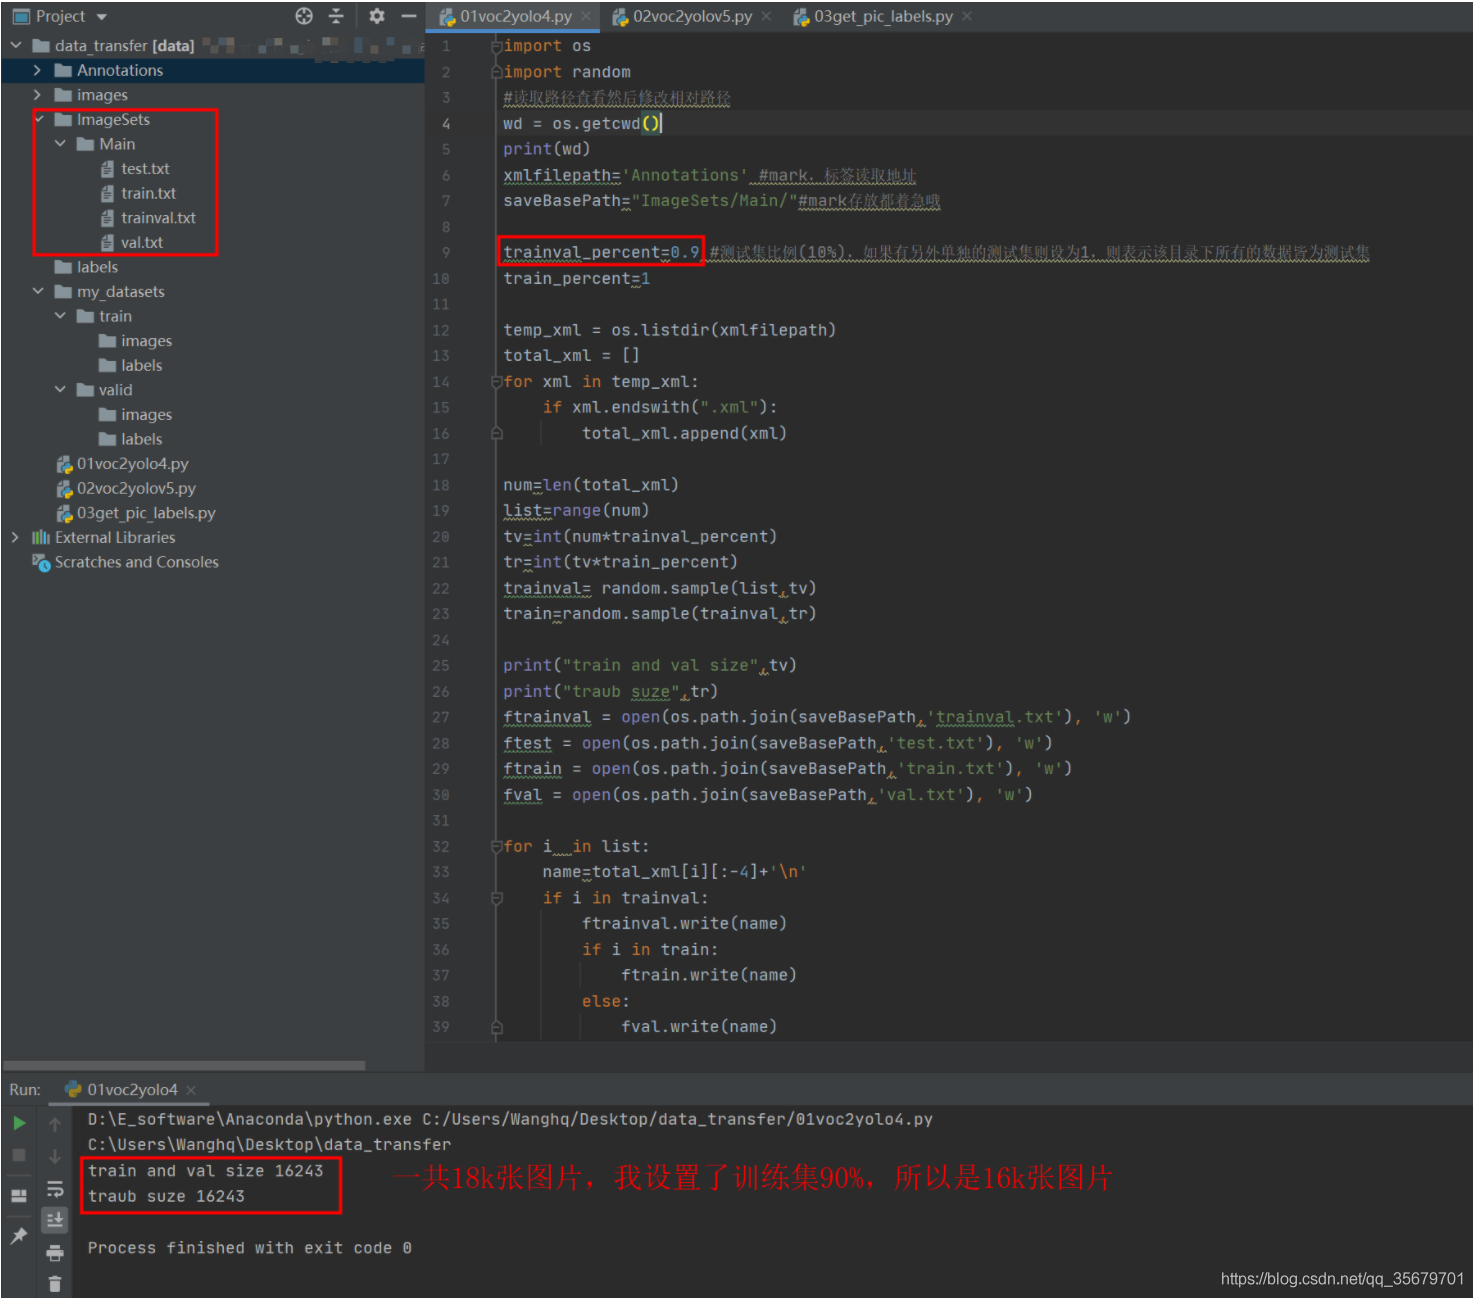
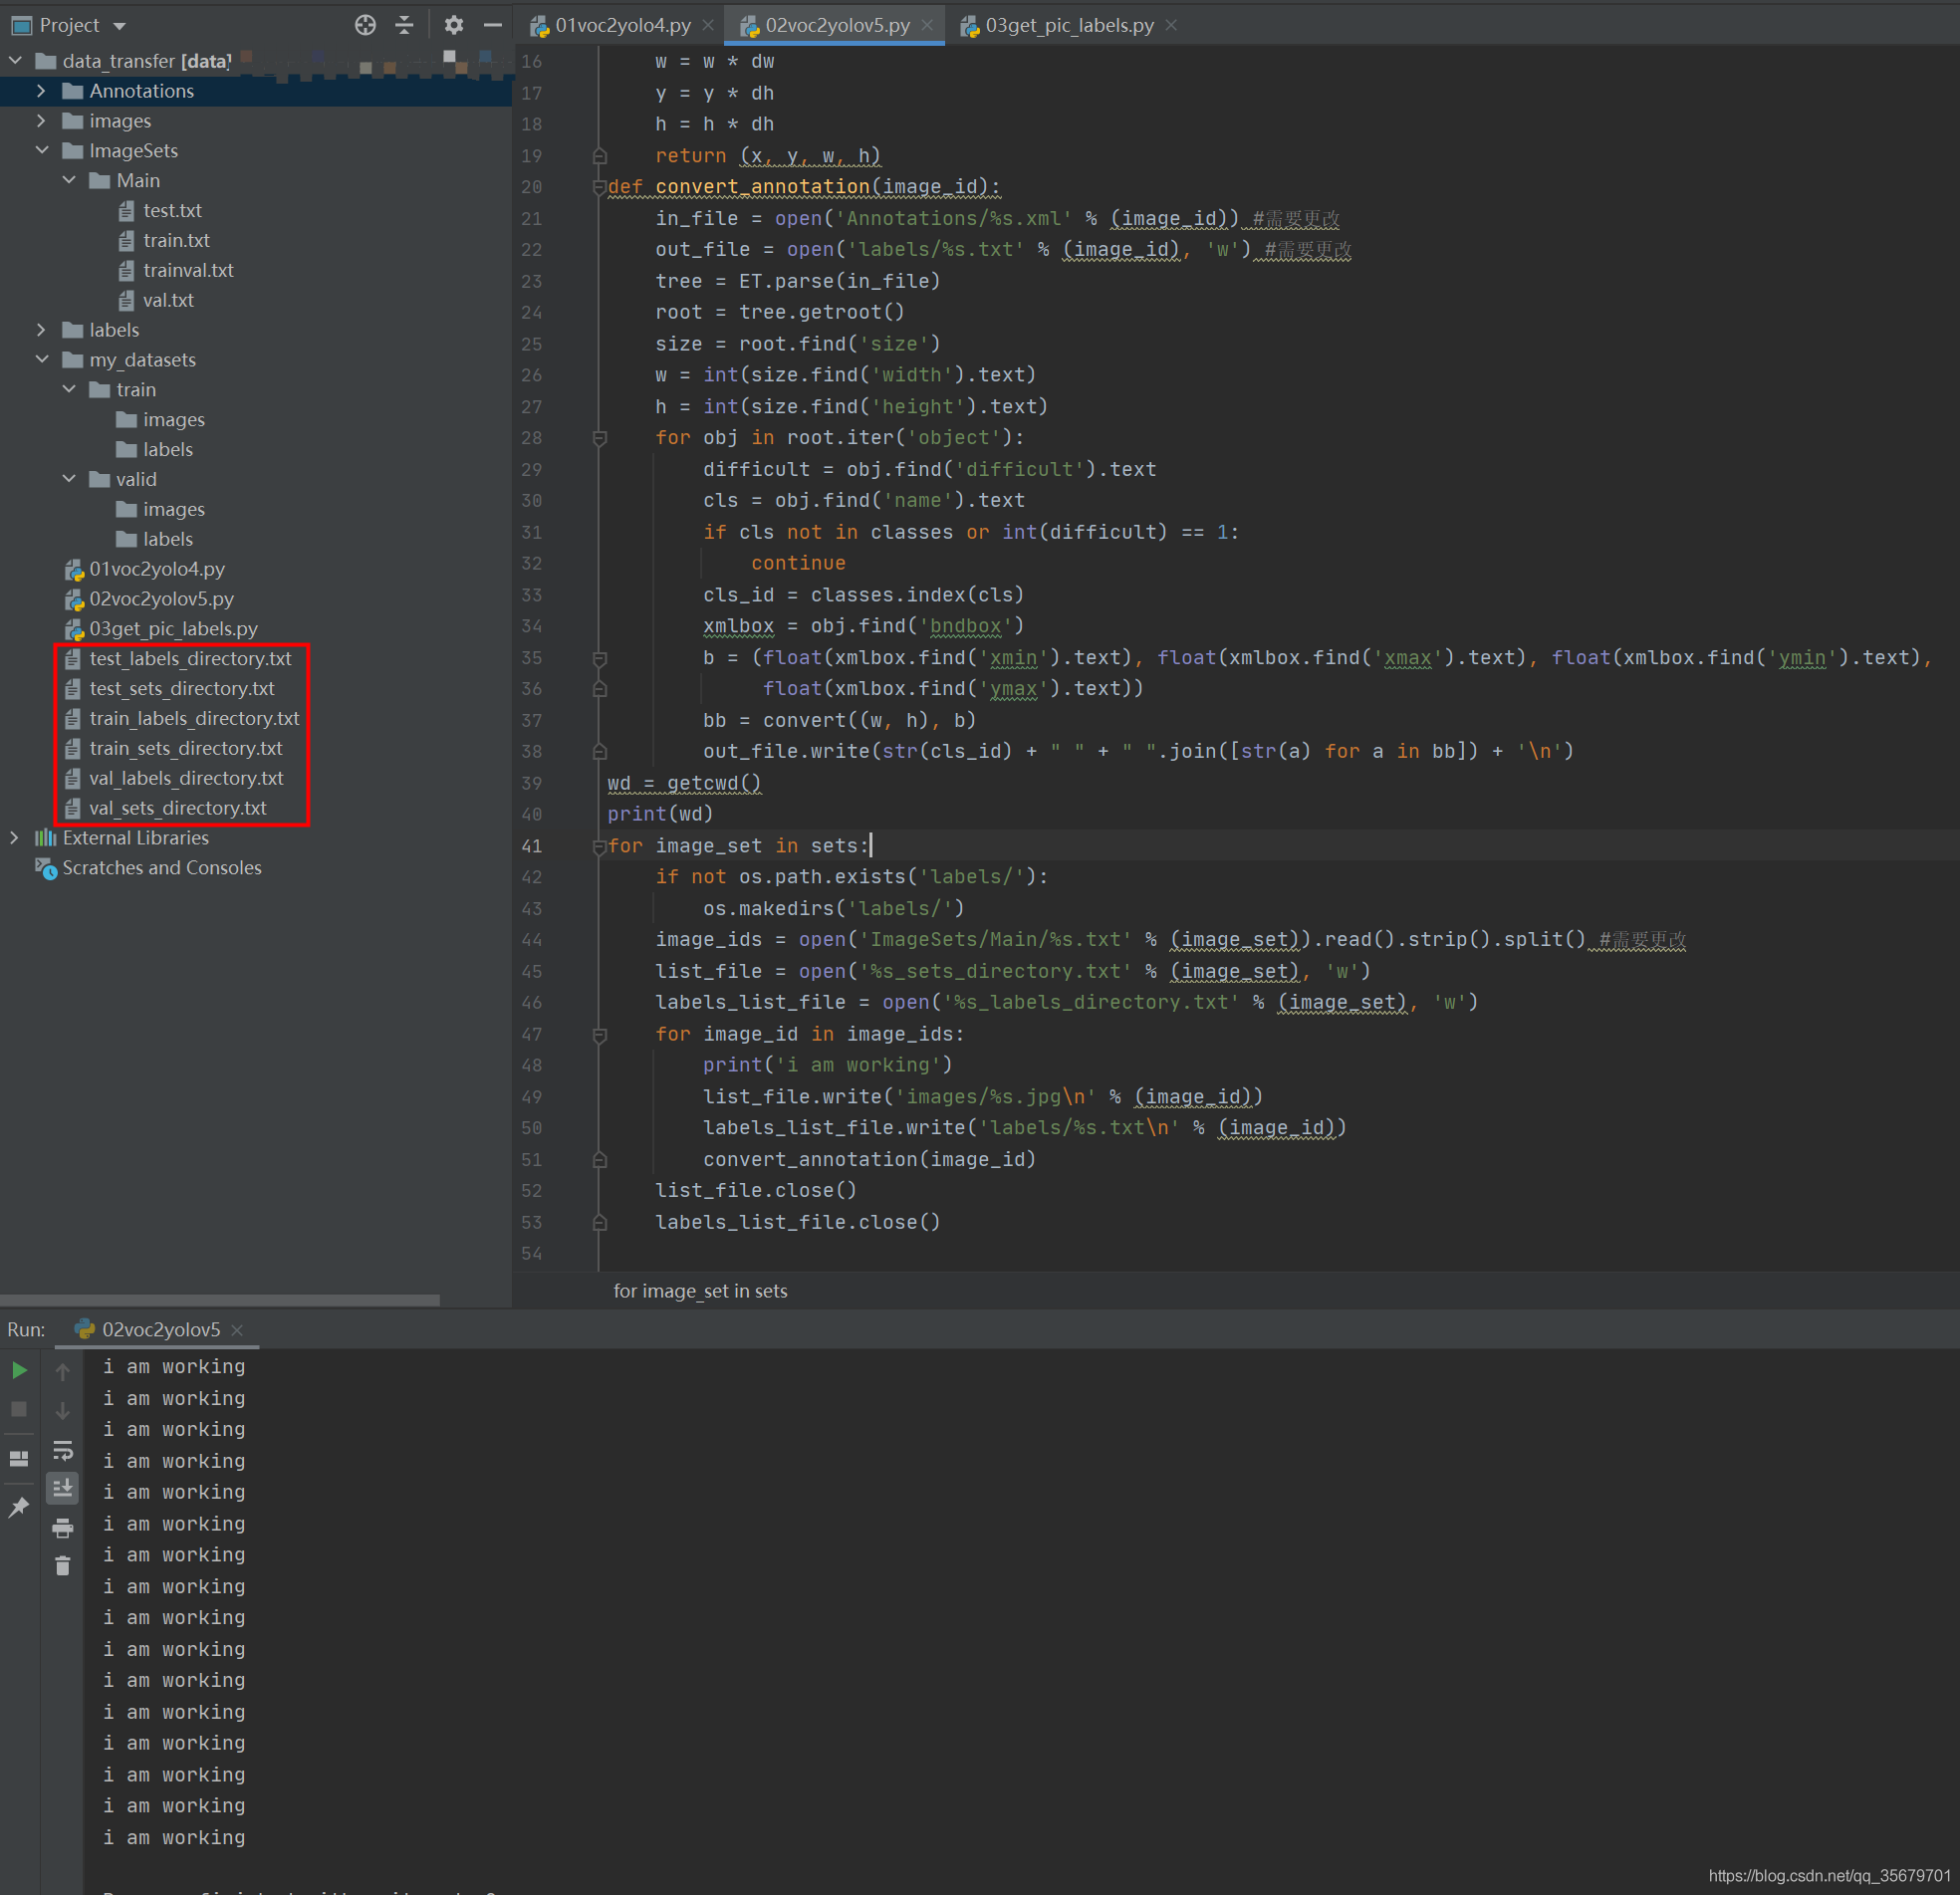
运行02后
出现了6个txt,其中*_sets_directory.txt就是第一部分中提到的YOLOV5支持的第二种形式,就是很多教程中的train.txt,test.txt,个人认为很容易与main中的同名文件混淆,所以我这里改了。
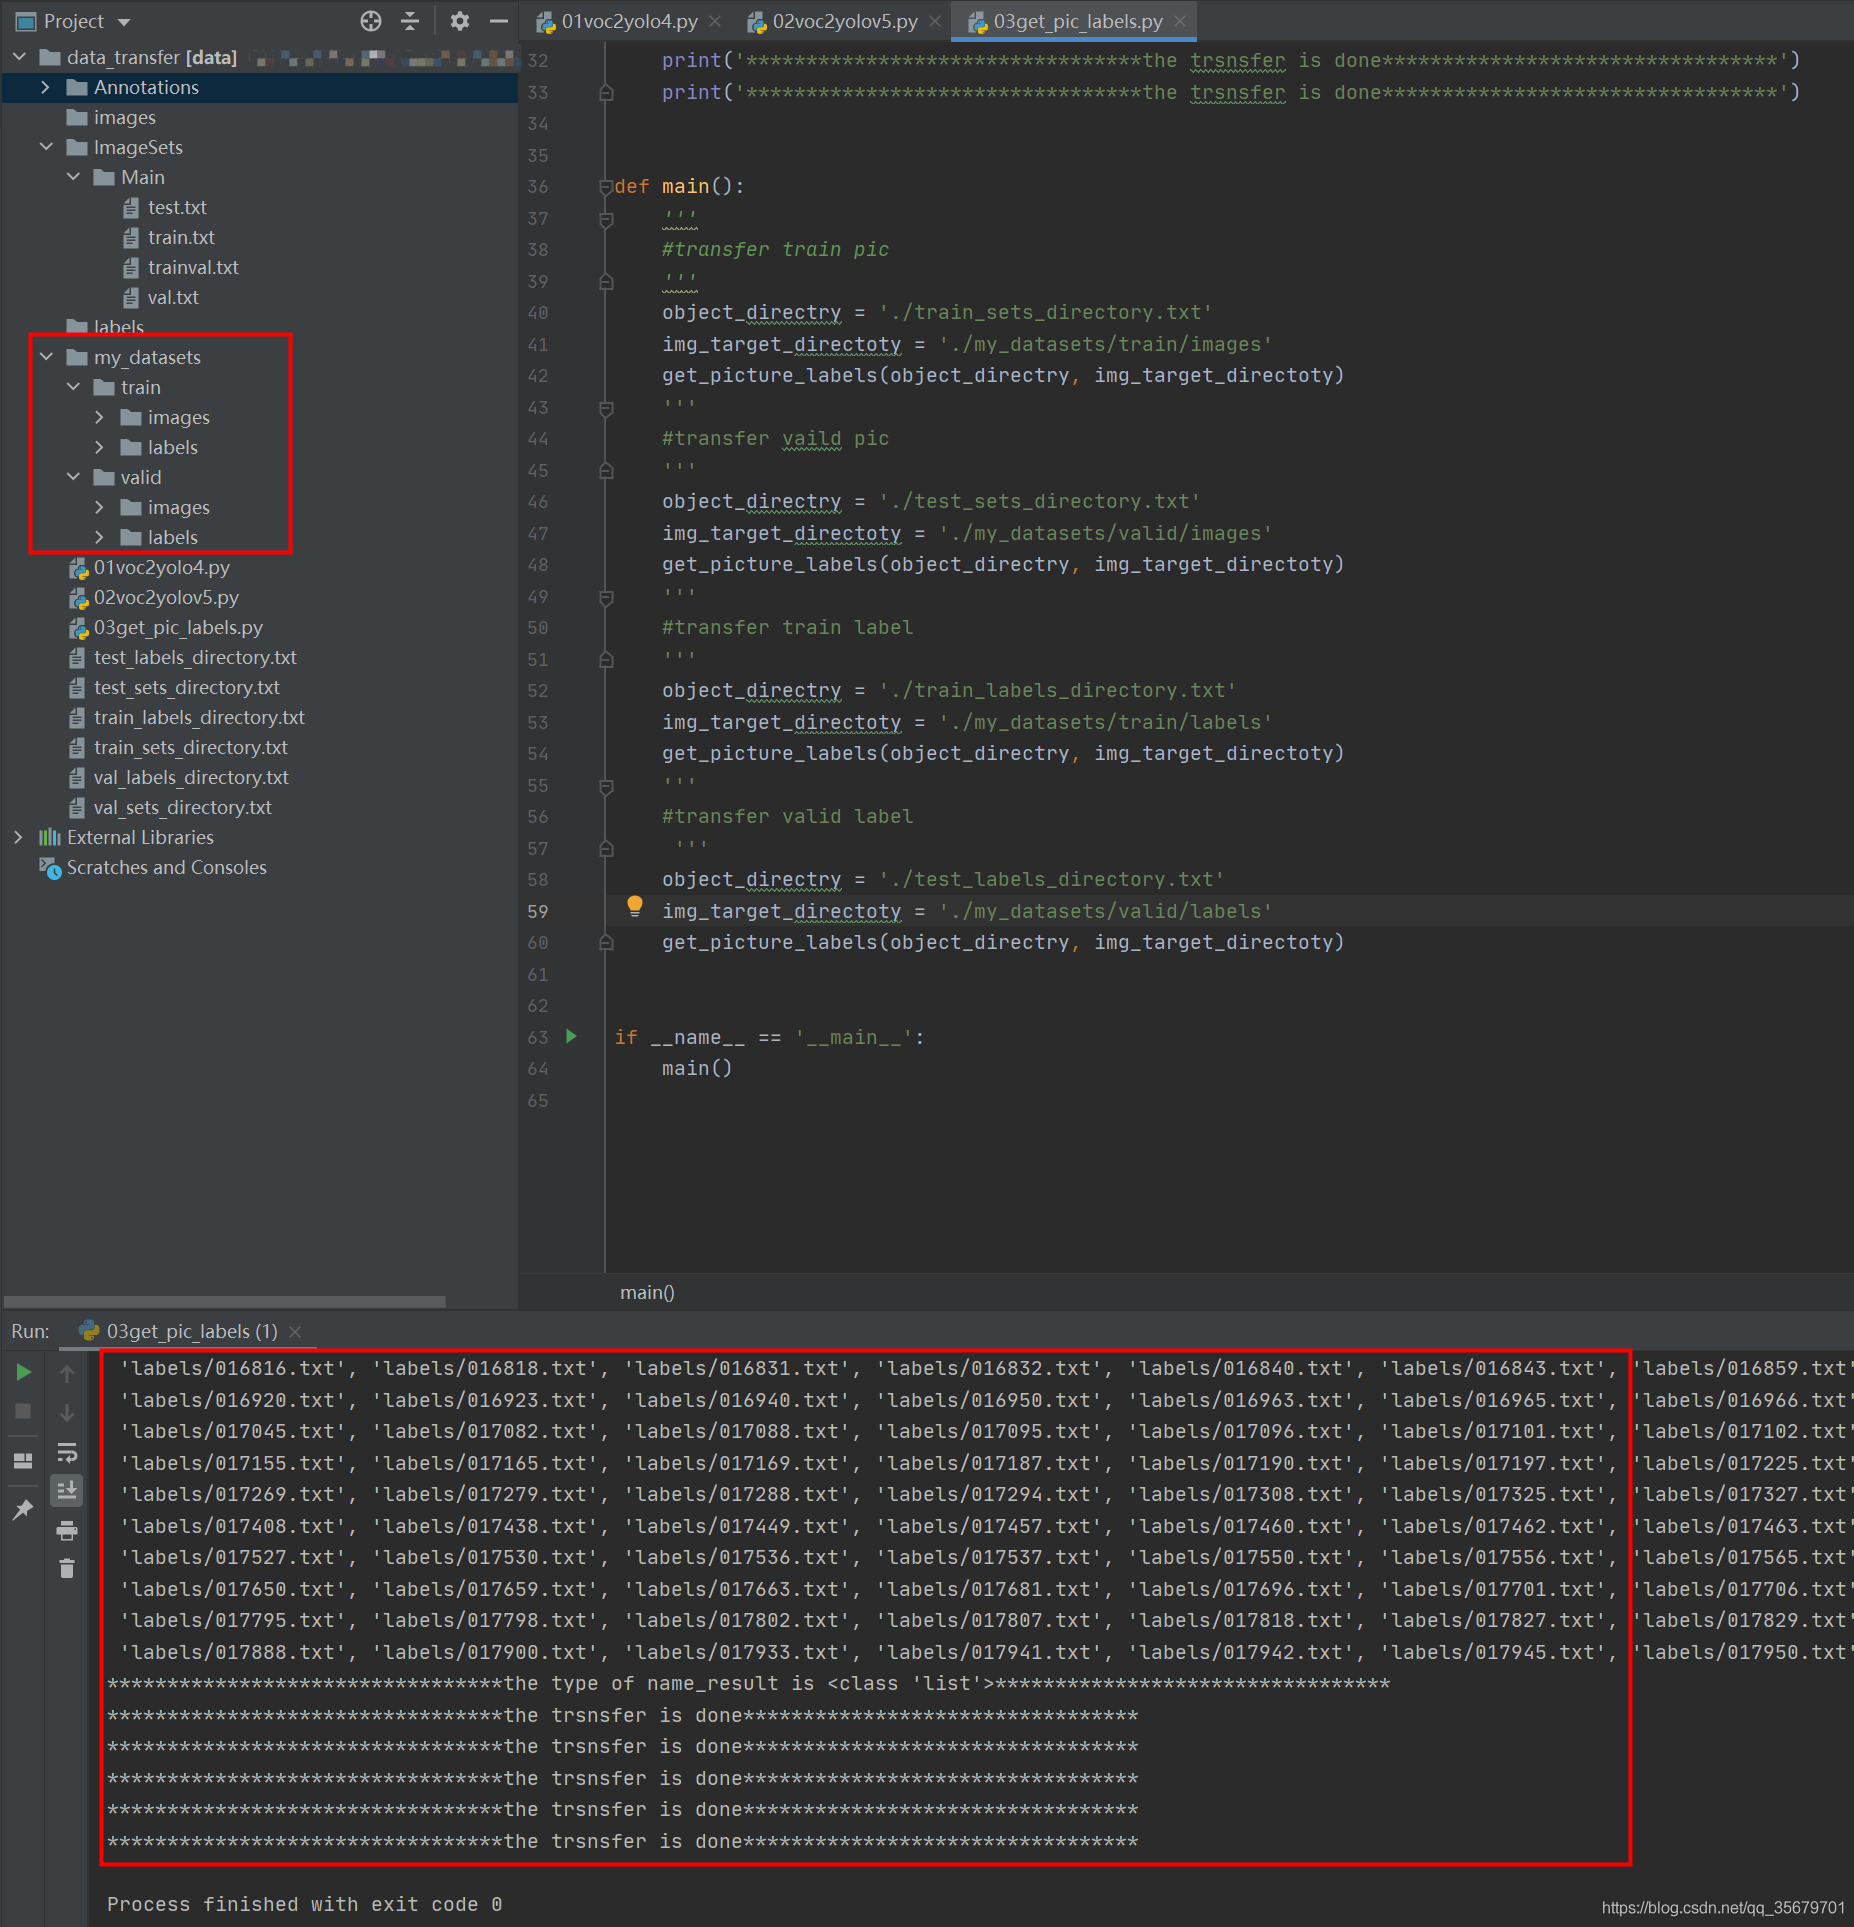
运行03后
可以看见my_datasets下的空文件夹编程了可展开的形式,“my_datasets”实际中根据自己需求改名字,它就是最后我们要的数据集,直接移走使用就行。
PS:我这里是将images和labels的文件移动到对应文件家下,如果想保留的话将03代码26行的move改为copy就行了
版权声明:本文为CSDN博主「一天天的就知道学习」的原创文章,遵循CC 4.0 BY-SA版权协议,转载请附上原文出处链接及本声明。
原文链接:https://blog.csdn.net/qq_35679701/article/details/109988372


